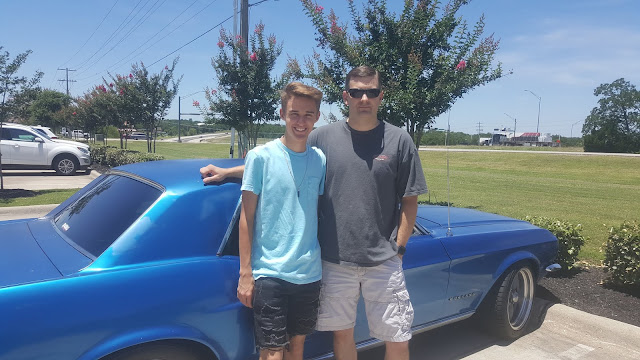
Monday, June 17, 2019

Ford Nationals - Areas for Improvement

The car ran near flawlessly and I'm proud to have built something to make the trip.  There are always was to improve and I'd like to think through some of those so I continue to improve the car.  The things that come to mind include:

1) I need to get some stiffer rear springs or find out what is going on with the passenger side rear tire.  It continues to rub the quarter panel.  It did it a few times on bridge transitions on the highway.  I can just see it destroying a tire.

2) Car tends to follow uneven areas on the highway like grooves.  It also gets rather sketchy when there are a large amount of unlevel and bumpy areas of the road.  I'm not sure if this is just the manual steering or the low profile tires.

3) Once it started to rain especially hard, I noticed leaks which seem to come from the wiper arms  and then all around the top of the windshield.  I don't think I installed new gaskets around the wipers arms which might explain some of the problem.  I'm not sure if the windshield is no longer sealed or what might be causing the windshield to leak.

4) The passenger door is a little difficult to open.  I think this is primarily because the portion of the latch mechanism that is mounted in the door jamb is not aligned properly.  I've tried to change it before but the screws which hold it in place don't want to budge.  I'll have to work on it again.


5) The left turn signal indicator on the instrument cluster does not light up when the blinker is on.  I imagine the bulb is out which is simple to fix.


6) There seems to be quite a bit of vibration in the drivetrain.  It is nothing I have not felt in the past.  It is just noticeable after hours of driving on the highway.

Sunday, June 16, 2019

Ford Nationals - Day 4 - Car Show & Drive Home

Another round of storms made it through Tulsa last night.  The forecasts all mentioned heavy rain and potential hail through the morning hours of the day.  Luckily, the hotel allowed me to park overnight under the front covered entrance area.  


I expected to wake up this morning and find it raining but it had stopped about an hour earlier.  It was raining all around Tulsa but not in Tulsa itself.  The car show was somewhat on the way out of town so I decided we would stop for a while.  If it started raining or there were no cars to see, we would just hit the road.

The car show was at the Southern Hill Marriott.  We parked and made our way to the car show area at about 8:15 and cars were just starting to find their spots. The rain no doubt impacted the turn out as I think many expected it to rain and likely left town already.  However, as the morning progressed, the clouds lifted and more and more cars arrived.


Aaron and I looked at the cars for a while and eventually decided we had seen what we needed to see.  Cars were still arriving but we would be here all day noticing ones from a distance which seemed to have just arrived and walking over to them.  At 9:30, we decided it would be best to leave and get an early start.

We headed south on 75 which is a decently smooth road with few of the potholes we found everywhere else.  We cruised with the morning sun shining and the A/C running.  It was starting off as a much better day than the weather suggested.  This continued until we made it to a few miles north of Durant, OK.

Just outside of Durant it began to storm like crazy.  The kind of rain where everyone is pulling off the highway and you can't see anything.  I've driven the Mustang while it sprinkled but never in the rain before.  There was no avoiding it this time.

It was not long before we noticed numerous leaks in the Mustang.  I don't think I put rubber gaskets back on the wiper arm brackets so there were some leaks there.  What was more surprising is that I think I must have a bad windshield gasket or rust holes at the top of the window as it was literally pouring water in from around the top and down the sides of the front window.  I certainly did not expect that.

We stopped in Durant and I pulled under the covering of a gas station.  Aaron dried inside the car some while I dried off around the windshield frame and put duct tape on it to seal up the area.  I did not want to but we still had five hours of driving ahead of us and the weather showed there were many storms still ahead.

We ate at a Sonic to wait out the rain a little.  When we left it was not raining but it took only minutes for it to start raining rather hard again.  Thankfully, the duct tape was doing a good job.  However, we now had no radio as I turned it off out of fear water was getting on it.  I tried turning on the headlights only to find they no longer worked.


We drove for hours home hitting rain sporadically.  We must have been driving in rain for a least and hour of two of the trip.  On several instances, it was hard to see the road but we continued on working our way back home.  We had old shirts from our bags in the back seat soaking up water in the floorboard as we drove but we made it home.


I was a little frustrated at the rain, other drivers, and that the trip was ending on what seemed to be a low point but I tried to stay upbeat.  In reality, we will likely look back on this and laugh in the future.  I guess I could not have prepared much for this as I would not have even considered the windshield would leak.  I suppose this was the point in the road trip where you earn it as mechanically we had no troubles.


We made it home at 6:30 in the evening and had Father's Day dinner with my wife and daughter.  It was a good trip.

...

I don't know exactly how it is possible but I tracked all of my mileage and the gallons from each refuel on the trip to check my gas mileage.  It seems that I was able to average just a little over 20 miles per gallon on the trip.  I drove a little slower than I normally would (65 or 70) but was still mostly going the speed limit unless the road was bad.  I'm impressed.


Friday, June 14, 2019

Ford Nationals - Day 2 - Hallett Raceway

We left the Dallas Holiday Inn Express at about 7:15 in the morning as we wanted to make it to the Hallett Raceway before registration check-in ended at noon.  


We cruised all the way without any difficulty.  We had the air conditioning running and the cooling system ran at 180 the entire time.  The weather was perfect with a light wind and in the low 80s.  You could not ask for better.  

We made it to registration at 11:55 providing just enough time to check in.  When we parked, I was beyond happy the car had actually made it.  I felt rather confident but had many others who acted as if I were crazy and would be left stranded in Oklahoma.


We made it right as the Corinthian Vintage Racing group was lining up to start racing.  My son was amazed at the cars, how loud they were, and how fast they went.  He immediately began taking pictures himself.


Thursday, June 13, 2019

Ford Nationals - Day 1


Starting mileage for the trip is 3,510.2.  When we finished up the day, our mileage was 3714.4.

I'm going to track my gas mileage as well.  For those purposes, I filled up last at 3370.2.

Tuesday, June 11, 2019

Preparing for Ford Nationals - Radiator Upgrade 4 - Radiator Arrival & Installation

The radiator arrived this evening and I immediately started work on the installation.  The outlets for the radiator align perfectly with the stock hose locations in the vehicle which will simplify installation.  The remainder of the radiator appearance is almost identical to that of the CC379.


While I did not expect it, preparing for Tulsa has turned into a last minute thrash to have the car ready.  I left work a little early and started work around 4:30 but did not finish until almost 9 o'clock.  Tonight, I have a work event for almost all of the evening so there really is not much opportunity to drive before leaving Thursday.  Needless to say, I'm not especially confident without at least a little drive time.  

The radiator installation took a while as there was quite a bit to do. I had to move the trans cooler plugs to the new radiator, adjust my new lower radiator brackets, mount the radiator, drill fan holes in the shroud, mount the shroud, connect the temperature sender, mount the shroud, install a new upper hose, mount the temp controller and relay, find a new place for the overflow tank, fill up the system, run it some, and then fill it up again.  

A new upper hose was needed because my original hose was too short to stretch to the new port location on the radiator. I used a Gates 21953 which is especially long so you can cut it to fit.  I ended up cutting about four inches off so there is plenty of material to work.  The hose seems to be of good quality so it is likely better than the factor lettering one I was using.  

Mounting the shroud to the radiator on the battery side is a chore.  There is not much way to get to the back of the bolts without removing the battery.  There really isn't much room to work around the much larger radiator.  I'm hopeful it is worth the work and expense.


The front of the radiator was previously entirely covered by the AC condensor.  There are now sections visible on both sides of the condenser although the receiver/dryer covers some of the driver side.  While it does not look like much, I hope that helps with my cooling troubles.  I figured it before and I have 25% more surface area but switching from a 1" -2 core to a .63" -3 core likely cut surface area of the core by 5%.  


It is barely visible below but the new upper radiator hose is contoured slightly differently.  I noticed as the hose I was using almost made contact with the tension pulley for the AC.  This one is routed a little differently which is good as it provides plenty of room around the pulley.


At some point, I'll get a new overflow tank.  I've used this piece of junk for a while but it works.  I'm glad I've not purchased one of the types which mount to the side of the radiator as I no longer have any room.  Luckily, I could remove the washer tank and it mounted using one of those bolts.  I'll call this good enough for now as I don't see another option.


Monday, June 10, 2019

Preparing for Ford Nationals - Headlight Adjuster Repair

I hoped the new radiator would arrive in the mail today but it was unfortunately delayed in Dallas.  Instead, I decided I'd work on repairing the headlight adjuster which I noticed was broken a few days ago.  I'd have just waited but the headlight was somewhat flopping around in the mount which would not work for the trip.

You can tell at the bottom of the image below, the actual mount for the headlight adjustment is completely broken.  

I purchased an entire repair kit but for now only installed this one part.  You should remove the fender for the job but I just removed the headlight from the headlight extension.  I then used a combination of crazy attempts to unscrew the screws from the back of the adjustment mount.  I then managed to get the new one installed.  I'll now need to get the car running again so I can adjust the headlights properly for the trip.


Sunday, June 9, 2019

Preparing for Ford Nationals - Radiator Upgrade 3 - Mounting Bracket Work

This evening, I worked on a way to mount the new radiator in place with the inadequate mounts I purchased from Scott Drake.

The following looks sketchy at best but I made two mounts which connect to the factory radiator mount location and extend over to the lower mounts on each side of the radiator.  The saddles at the bottom will then hold some weight and protect the bottom of the radiator from large bumps.  These will hold the radiator, along with the top mount, from moving either forward or backward once installed.  

Driver Side:

Passenger Side"

Saturday, June 8, 2019

Preparing for Ford Nationals - Radiator Upgrade 2 - Incorrect Radiator Arrives

The Champion CC379 radiator arrived today and I quickly realized the return outlet was on the wrong side.  I needed to purchase a Champion CC338 and made a mistake.  I quickly ordered the correct one in hopes of receiving it in time to install before the trip to Tulsa.  I decided I'd wait just a bit to return the CC379 as it has the same size core and I could use it for mock up purposes.

As I sat the radiator in place this evening, it was very apparent this would not be just a drop in type situation.  I purchased the stock upper and lower radiator mounts from Scott Drake along with the rubber insulators.  While it is a start, it is far from functional.

The upper mount bolts into place without any trouble.  The mount will fit over the top of the radiator as expected without the rubber insulators in place.  However, the insulators are just too thick (~1/4" thick) to fit in the upper mount and still have it slide over the radiator.  I don't see a way to fit anything thicker than 1/8" in the mount with the space that exists.  

The lower mounts are worse as they are exactly 3" wide.  However, where they contact the radiator, it is only 1-3/8" wide so the bottom can just slide forward and backwards.  I can complete rebuild the lower mounts but I think I'll use them to hold the weight and then make some brackets to the radiator support to keep the radiator from moving forward and backward.  I might put some more work into it later but I need to get this going for now. 

With no radiator, I'm limited on what I can do this weekend.  With it being our 19th wedding anniversary, my wife and I are heading out of town.  I'll do a bit of work when we return on Sunday so that I can install the radiator which is scheduled for delivery on Monday.

Thursday, June 6, 2019

Preparing for Ford Nationals - Radiator Upgrade 1 - Removal & Maintenance

Last night, I started some preparation for a last minute project.  I can't have the Mustang overheat so I've decided to purchase and install a big block style three core radiator.  I've saved some money for a paint job and I dipped into it in order to buy the items needed.  

In preparation, I drained the coolant first and then removed the hoses, radiator shroud, overflow tank, radiator side covers, and fan controller.  The fan was removed from the shroud but is left wired and sitting in the car so as to not cut the wiring.  I then removed the radiator and set it aside.  The task was fairly easy which means something will soon go wrong.  


Tonight, I removed the upper condenser mount as it is missing two holes needed to bolt the big block radiator mount to the radiator support.  I drilled and then filed away to create the two oblong bolt holes.  I then decided I would reshape the top of the panel as it stuck up slightly above the radiator support in an annoying way.  With the top rounded, I then sanded it down and painted it with more of the Krylon paint.  

With that done, I checked the torque of all the rims and set the air pressure in the tires to 30psi.  I then filled a two gallon gas tank and placed it in the trunk in preparation for the trip.  I'm working to do just a bit each evening so I'm ready without stressing out when the day comes.

Tuesday, June 4, 2019

Preparing for Ford Nationals - U-Joints & Fluid Check

This evening I replaced the u-joints with new Spicer units I purchased from Summit.  I feel a slight vibration on deceleration and thought it best to replace them to see if they were the cause.  I'm quite sure I replaced these previously but have no record of it to know exactly when or what brand I used.


The following u-joint is from the yoke section of the driveshaft.  It looks worse than it is but the new one certainly has a much tighter feel.  I pressed them into the drive shaft with my hydraulic press.  The new u-joints came with several different sets of locks but I did the .058 set as that is the size of what was already installed.  


This is the rear set.  The new set does not have any grease zerks.  They are suppose to be maintenance free for life. 


When this task was done, I installed a new 49" belt on the air conditioner.  I then checked the fluid level of the rear axle which was good.  Some transmission fluid leaked out when I removed the driveshaft so I needed to add a little Merc-Dex to get it topped back off.  I checked the oil level and it is exactly at the middle of the three dots on the dip stick so I need to top it off.  Current mileage is at 3420 since the engine rebuilt. 

Monday, June 3, 2019

Preparing for Ford Nationals - AC Part 14 - System Recharge

I took the Mustang to get the refrigerant removed, trinary switch installed, and then the system refilled with refrigerant.  The cost was $125 for an hour of labor.  The air conditioner works but I'm a little timid to use it on high as it starts raising the engine temps. 

The temperature today outside was 95 degrees.  While driving the last few days, the temperature has increased to 195 but then stops.  On the way home with the AC on medium, the temperature went to 210 and sat there.  I drove a bit after dinner and the temperature climbed even higher until I just turned off the AC.  This is concerning.

I made improvements to the cooling system as part of the AC install.  I'm a little disappointed that things now run hotter with the A/C off.  I even went with the Spal condenser fan thinking it would be added insurance.  It seems I'll be able to run it for 15 minutes but will then need to turn it off to drop the temps.  I'm not sure what will happen when we start to hit 100 degrees.

I made it home after driving this evening and popped the hood.  The instructions stated to rotate the compressor by hand after charging the system before installing the belt.  I had the shop follow the steps which means they installed the belt.  IT was not tight enough and has been rolling in the grooves of the belts.  This explains why it felt like it was blowing colder at some points than others.  Perhaps this would cause things to get hotter than they should?


I think a 49" belt will work better than a 49.5" so I'm going to go ahead and purchase a new one as this one is frayed in places and is a little deformed from the heat of rolling through 

Sunday, June 2, 2019

Preparing for Ford Nationals - AC Part 13 - Finalizing Wiring

I spent the morning working on the electrical system which runs the fans.  Both fans are wired to come on as needed for the A/C or based on the engine temperature.  The wiring could have been greatly simplified if the smaller fan only ran based on the A/C.  However, I figure I will take advantage of all the cooling power regardless of what is generating the need.

The temperature control knob and the relay shown in the middle of the diagram are mounted to the radiator shroud.  The other two relays are mounted along with the headlight relays near the radiator support on the passenger side.  They are mounted using a bracket I made from more of the 1-1/4" angled aluminum.


I've tested the system to confirm it is activated by the trinary switch (ground the output wire) and the fans both turn on as expected.  The first two times I did it, the condenser fan turned on and then back off while the other fan continued to run.  I kept testing it trying to duplicate it and had it occur one more time out of about ten attempts.  The wiring is all shared so this is just due to the fan breaking in (doubtful), due to the relay (lowest one in set), or a problem with the fan.  

I'll have to drive to the shop with the grill and valence missing.  This allows them access to the current pressure switch so they can remove it and put in the trinary switch.  I don't really like others working on my car so I've tried to do all the work myself.  I'm sure they don't like it as it is all hand made and they don't know how any of it works.  Regardless, I'm hopeful to get the system charged again tomorrow after taking it on a test drive this evening to ensure the temp based can control still works fine.  


Saturday, June 1, 2019

Preparing for Ford Nationals - AC Part 12 - Condenser Fan & Block Off Panel

I searched for any type of foam or panel which would close the gap between the radiator and condenser without success.  I then started thinking of how I might be able to make something myself.  After checking the metal selection at Lowe's, I came up with an option.

I fabricated a block off panel between the condenser and radiator for the passenger side of the assembly.  The panel is made from 1/16" right angle aluminum which is 1-1/4" wide.  I shortened one side to only be 1/2" thick and the other 1-1/4" side was a near perfect fit to seal the opening.  I then painted it with Krylon 1613 semi-flat black and bolted it in with stainless steel bolts and nyloc nuts.  


I started with a block off panel for the passenger side as it had the largest gap.  While each side could benefit from a block off panel, the bottom and top are somewhat enclosed.  The driver side is just a bit too hard to block off due to the tubing and receiver dryer.  I may do the other sides later but for now I want to see how things perform with the single block off plate and a fan.  I have enough left that I can make something for across the top if needed.


I then mounted the Spal 30100374 fan to the condenser.  This is a pusher fan that I mounted with a set of Spal mounting brackets.  They screw to the top and bottom rails as did the mounting brackets for the condenser.  I'm not sold this is the best long term option but I think it will certainly work in the short term.  The fan certainly seems secure enough.


The fan fits about as perfectly as possible between the condenser and the hood support bracket.  There is very little additional room available and I did not need to cut anything.  I'd recommend it for anyone in this same position.


The last of the tasks for the day was to wire up the new fan and trinary switch.  I took the front valence off for easy access.  With the relays for the headlights exposed, I decided it would be best to just make a new relay bracket to hold the headlight relays and both relays for the new fans.  Once I had it built, I decided to call it a day and handle the actual wiring tomorrow.

Preparing for Ford Nationals - Test Drive

My daughter and I went for a drive in the Mustang this morning to put a few miles on it in advance of the trip to Tulsa.  We drove a total of 80 miles on the highway at speeds between 65 and 75.  The temperature was rather mild at only 80 as we started at about 8:30 in the morning.

There were no issues with the Mustang for the whole trip.  The engine temp made it to 180 and then slowly made its way up to 194 after about 20 miles.  It then stayed at 194 essentially the entire time.  We turned around in a small town and were stuck in traffic due to a wreck for a few minutes but it did not seem to matter.  

The A/C is still not finished and I expect when running that it could cause some additional heat under the hood.  I did have a few new parts arrive that I expect to install this weekend.  Those plans include a Spal 10" pusher fan (#30100374) which will be mounted in front of the condenser, new Spicer U-joints for the driveshaft, and a trinary switch to operate the fan.  

The plan is to run both fans off temp and the trinary switch.  I could change it over time to run the radiator fan off engine temp and both off the trinary.  However, as a starting point, I think it would be best to have as much air moving as possible.  I've a 100 amp alternator and little running on it so I don't expect to have any charging issues.