Saturday, February 23, 2019

Preparing for Ford Nationals - New Door Panels & Handles

I purchased a set of TMI door panels and Scott Drake handles with a few gift cards I received at Christmas.  These were obviously not really necessary but I've wanted to replace them for a while to give the interior a nicer appearance.

The new door panels (on left below) look quite similar to the originals (on right below).  The grain of the vinyl looks exactly the same.  The only very slight variation from original is the lines in the panel look slightly different but not enough that anything short of a expert would notice.  


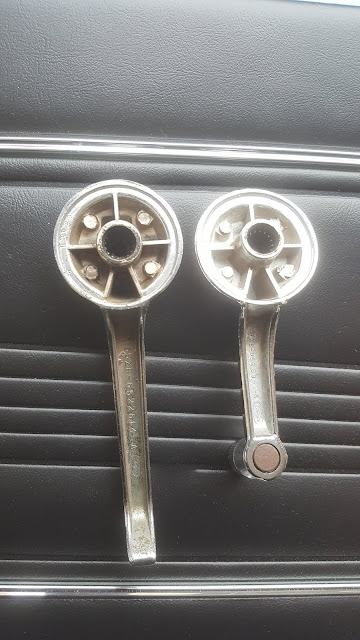
The Scott Drake handles were perfect.  I've really come to appreciate their products as they are always perfect.  The only issue I had with installing them were the screws which should work were too large for my vehicle (door locks and window cranks).  I ended up buying a decent set at Lowe's.


This is a quick look at the part numbers on the original handles in case I wanted to reference them in the future.  


This is a quick look at the finished product.  I've already replaced arm rests so this completes finishing up the front doors.  


Sunday, February 3, 2019

Preparing for Ford Nationals - Reverse Light Install

Without carpet for the subwoofer box, there was little I as interested in working on today.  I did take a few moments to install my new Scott Drake reverse light kit (KIT-ELC-7).  As expected, it was easy and straightforward.

The main reason for the replacement was the quality of the rubber plugs as I don't want exhaust fumes in the car.  The stock housings were in bad shape and the lenses were very cloudy.  They were a good all around improvement despite being rather expensive.  

As I installed the lights, I compared them to the originals I removed.  The markings on the lenses are an exact match to the originals.  The housings and rubber gaskets look identical but have slightly different markings on the back.  


The lights came with two different screws to install the lenses and two sets of nuts to install the housing.  My stock lights had two different types used also and neither matched what came with the kit.  I just picked what I preferred and installed the lights.  I tested them and they are very bright which will work out well when backing up at night.


Saturday, February 2, 2019

Preparing for Ford Nationals - Subwoofer Box Build

I spent many more hours than I expected today working on a subwoofer enclosure for the Mustang.  The job was not especially difficult but I was working to make it as perfect fitting as possible.  By the end of the day, the box was complete but I need some carpet to cover everything.  

I decided to replace the metal divider I created behind the back seat with the front panel of the subwoofer enclosure.  I started by copying the shape of the metal divider panel to 3/4" MDF with the addition of a few angle cuts along the lower edge.  The first panel I made fit quite well but I decided to make a second to get the fitment perfect.

Behind this divider, I built a small box which attaches to the divider panel.  The divider panel then has a whole cut slightly larger than the diameter of the 10" speaker which essentially recesses the entire speaker.  The speaker itself is mounted to the front panel of the subwoofer enclosure.  This is the box before adding the front panel where the speaker mounts.


I centered the subwoofer in the new seat divider panel.  The metal bars which run vertically on the back of the rear seat pass on either side of the subwoofer.  This ensures that even with the speaker recessed it will not hit the back of the seat.  Additionally, placing it in the middle keeps anyone from leaning back against it compromising the clearance.


The box itself is 20 3/8" from one side to the other, 10 1/8" from top to bottom, 6 1/2" deep at the top, and 9/16" deep at the bottom.  The angle of the box perfectly matches the seat divider and makes the back of the box perfectly straight up and down.  The box ends at the edge of the trunk panel as it starts to angle down towards the gas tank.  I made it so the I can create a block off panel which attaches to it and stretches from one side of the trunk to the other.


The speaker I'm using is a Kenwood WPS1000F which is a shallow depth 10" subwoofer.  The recommended sealed box size for the speaker is .60 cubic feet.  The speaker itself displaces .04 cubic feet.  My original plan resulted in a .64 interior volume box but after a few changes I made during the build process the interior size was .62 cubic foot.  This is certainly close enough and I'll be adding polyfill to the inside which will make up the difference.

I'll need to obtain some carpet to finish off the box.  The pictures above are from the mock up process.  Once I confirmed it fit, I took it all apart and screwed it back together with Liquid Nails at each seam.  I'll get some carpet and wiring for my amplifier and finish up the installation another weekend.