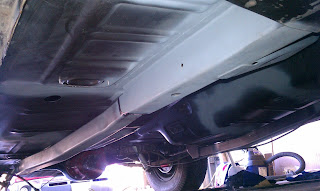
Wednesday, December 28, 2011

Performing the Shelby/Arning Drop

I performed the Shebly drop on my front suspension today. This involves removing the shocks, springs, and then the upper control arms.  The mounting holes for the upper control arm are then relocated 1” down perpendicular to the centerline of the original UCA mounting. This was something planned by Ford (Klaus Arning) during the design of the Mustang but it was actually not performed so the car would understeer if pushed to the limit.


This was a change made by Shelby on the GT350 cars. I took on the project since I'm just standing around waiting for the motor to be rebuilt.  While I had the springs out, I removed a 1/4 coil from my front coil springs to drop the ride height slightly.  Although the car is back together, I can't see the difference yet as the engine is not in the vehicle.


The Shelby drop is highly recommended as it lowers the center of gravity on the front of the car, reduces body roll by 7% to 9%, and improves the camber curve.  I often read of the benefits on Mustang forums but waited as I really did not want to drill non-stock holes in the engine compartment.  While I've not departed an incredible amount from stock, I'm no longer as worried and would perfer the drive improvements.

Friday, December 23, 2011

Transmission Preparation & Parking Brake Work

Today, I drained all the fluid from the transmission while it is out of the car.  There was some discoloration to the oil which caught me off guard at first.  I then remembered using moly lube on all the parts.  This should account for the strange dark streaks in the oil.

I cleaned up the outside of the transmission and touched up any paint which was damaged during the undercarriage project or when removing the transmission.  It still looks as good as it did when I rebuilt it about two years ago.

I don't believe I've mentioned the replacement parking brake lines are too short.  They can't be connected together using the stock connector and then still reach the adjustment rod.  I purchased a longer adjustment rod from Mustangs Unlimited (as well as a new air cleaner for my K&N filter) and installed it today.

I lifted the rear of the Mustang and took off the wheels to make sure the drums are still adjusted perfectly.  I then adjusted the parking brake such that it works very well but is definitely fully disengaged when the handle is pushed in. 

I've still not heard back on my engine.  I'm hoping they call before I need to go back to work next Thursday.

Thursday, December 22, 2011

Painting Engine Components & Bleeding Brakes

I've a few days off for the holidays and decided to go ahead and start painting a few items for the new engine.  I'm hoping to get a call soon stating the engine is ready.  Painting the parts now will allow me to get as far as possible while off when I do get the call that the engine is ready.

I started off by painting the timing cover which I stripped I few weeks ago.  I then painted the oil pan followed by the water pump, intake, crank pulley, and harmonic balancer.  With the exception of the crank pulley, all of the parts were painted with Duplicolor 1606 Dark Ford Blue Paint. 

When my wife arrived home at the end of the day, I talked her into helping me bleed the brakes.  Since I removed the master cylinder to paint it a couple of weeks back, this would also be needed in order to start driving the car.  This took longer than expected but the brakes are now fully bled.

Sunday, December 18, 2011

Odds & Ends...

I really enjoy working on the Mustang in a clean garage.  Everything seems much more organized and as if it is going better.  I suppose it the obsessive compulsive side of me.

Anyway, I spent about half the weekend cleaning up the garage and the other half working on some random Mustang projects.  I painted the oil pan, block plate, water pump, water pump pulley, dipstick, and coil bracket.  Aside from the painting, I made a pin switch for the hood and mounted my alarm siren.

I ordered most of the remaining parts to complete the engine.  I'll need to check the proper push rod length with an adjustable push rod.  I'll then be able to order the proper size and some break in oil.  However, before I can do any of these things, I need the engine back from the machine shop.

I called about the engine last Tuesday and was told it was build decked.  I called again this Wednesday to check on things and was told the decking was done and it was "in line".  After waiting for him the elaborate, he said it could be done sometime this coming week.  I told him I had time off after Christmas and it would be great if it could be done next week. 

Saturday, December 10, 2011

Dash Restoration Complete!

Two weeks ago, I managed to break the lens on my AutoMeter oil pressure guage.  AutoMeter sent me a replacement lens about a week ago and I installed it last night.  I then connected all the wiring in preparation for installing the instrument cluster today.  The install was easy and the final product looks incredible.


With the interior complete, I'm running out of projects to complete without the engine.  I checked on it earlier this week and they had finished mocking up the motor to measure the deck.  They have taken it apart and are now going to mill the deck to get the pistons flush with the deck (zero deck). 

I decided to go ahead and work on installing my Flowmaster exhaust system.  The tailpipes hang from hangers connected where the original tow hooks are at on the rear frame rails.  I took off the tow hooks and installed those brackets.  I then removed the rear seat as there are brackets which connect through the back of the seat area and hold up the mufflers. 

Once the brackets were in place, I had to remove the shocks to get the tailpipes in place.  Everything fits excellent.  I went ahead and installed the DynoFlow mufflers and the H-pipe to make sure everything fit without any trouble.  I'm a little worried the exhaust is not going to be long enough to mate up to my short tube headers.  Unfortunately, I've no way to know for sure until the motor arrives. 

I worked on cleaning up the engine pullies, coil bracket, and block plate.  I'm ready to paint them but I'm not sure if I want to use the DupliColor 1606 or Plastikote 224 paint.  I'll probably look for some of the Plastikote tomorrow so I can try them both out to see which I like best. 

The last think I did was install my registration sticker which has been sitting around a while.  The one of the car expired almost a year ago.  I did not want to forget about it and I'm really getting close to having it in drivable condition.


 placed the registration sticker on the windshield today as the old one expired exactly a year ago. 

Sunday, December 4, 2011

Steering Column, Wiring Repair, and Underhood Prep Work

This past Wednesday, I received a new roll of friction tape in the mail from NPD.  I removed the under dash wiring harness from the car and cut all the told tape off to inspect the wiring.  The black/green wire which was damaged was only slightly damaged.  While it likely was not entirely necessary, I replaced a 10" section of the wire closest to the instrument cluster. 

I put the wiring harness in this weekend and replaced the bulbs in the dome light and tail lights.  I went through and tested everything and I have a functional horn, headlights parking lights, radio, brake lights.... in short, everything works.  I'll just need to install the gauges to finish off the interior.

I put a few coats of paint on the shock towers and then reinstalled the centerlink and crossmember in the engine bay.  I reconnected the idler arm, rebuilt steering box, and tie rods to the center link.  I then installed the column, handled the column wiring, and installed the new steering wheel.  Lastly, I put on the new turn signal and emergency flasher parts on the column.

The last thing I did today was paint the accelerator pedal linkage and installed it in the car.


Sunday, November 27, 2011

Stripping & Painting Engine Mounting Area

A few years ago, I stripped and painted the engine compartment.  I could not reach the entire shock tower as I didn't remove the engine.  Since the engine is out, I'm stripping and painting these areas while I have the chance.

I stripped the passenger side yesterday which was not a fun job but not overly difficult.  I handled the driver side today.  The driver side was a little worse as the oil extension and sending unit leaked when I purchased the car.  While I cleaned all the oil up years ago, there was still some hiding under the engine mounts. 

I stripped them both with a wire wheel and coated them with Eastood Rust Encapsulator.  I've some of the original Krylon paint which I'll put on the area after waiting a while for the Rust Encapsulator to dry. 

I also need to strip the motor mounts themselves.  I'll save that project for another day.  I'm stopping early today to enjoy my last day off for Thanksgiving.

Before:
After:


Saturday, November 26, 2011

Another Day of Random Projects

Today was another day of small, random projects.

I'm expecting a call stating the engine is ready any day now.  The gaskets for assembling the motor arrived in the mail yesterday.  I stripped the oil pan and put a coat of primer on it today.  I'll want to seal up the motor with the oil pan soon after it arrives to avoid anything finding it's way into the motor.

I worked on the alternator brackets which had paint chips and bolt marks from constantly working to keep the belt from squealing.  I sanded them smooth and repainted both of the brackets.  I also worked on the bracket which is used to hold the speedometer cable to the driver frame rail and painted it as well.

I removed the underdash wiring so I could fix the damage I caused the other day.  When I wire something, I use yellow for constant, red for ignition, and black for ground.  Somehow, I managed to splice in the stock black/green wire with all the grounds from the gauges.  I suppose I did not see the green strip and this wire is a powered wire which caused the issue.  It did not cause any damage to speak of so it will be an easy fix.

When I stripped and painted the engine bay three years ago, I did not pull the engine.  I stripped and repainted everything except where the motor mounted.  With the engine out now, I'm working on those areas to finish off the job.  I did the passenger side today and will hopefully do the driver side tomorrow.

The last thing I did was put the front valence, bumper, and grill molding back on the car.  It looks strange with the black reproduction valence and other original blue painted panels.  I don't care.  I'll get to that later but for now I'd sure like to get it in running order. 

This is a picture of how the Mustang sits today in my garage.  I'm trickle charging the battery just to make sure it is charged up as it has not been used in a year.  You can make out the oil pan sitting on the top and the transmission crossmember hanging up in the background.  The radiator is on the ground by a little work bench.  I'm sure ready to get all these parts back on the car and drive around!

Random Projects

After my last experience working on the Mustang, I decided to take a few days off.  I also placed a few part orders and am at a standstill on some of the projects.  However, I decided to take care of a few small things today.

I started by building a new rear speaker deck for the Mustang.  The previous over installed 6 x 9 speakers by bending the openings in the rear deck larger.  I straightened the metal and made a new rear deck so the speakers would fit without altering the metal. 


I then installed my fuel line, cleaned out the trunk, put on a new set of license plates, installed the rear seats, seat belts, and window cranks.  I repainted an alternator bracket, center link, and engine crossmember.  Finally, I cleaned up and painted my water pump and it is ready for the motor when it is done.

Sunday, November 20, 2011

My Day for Things to Go Wrong!

What a horrible day!

The day started off simpy enough with me installing the parking brake lever.  There is a pin which is inserted into the portion you pull to hold it onto the braket.  I installed the lever facing the wrong direction on accident and had a tough time switching it to be correct.

I then carried out the seat for the Mustang to go ahead and install it.  It is a bit early but I need it out of the spare bedroom since we will have visitors on Thanksgiving.  Somehow, one set of threads on the seat bolts were damaged.  It was the last bolt after I'd put a nut and rubber plug over all the others.  Go figure

I then tried to install the windshield wiper arms which are under the dash.  This is obviously a project I should have done earlier in the project.  It was near impossible and required a large number of cuss words to finish up.

I then turned my attention to the instrument cluster with my Autometer gauges.  I wired them up and then turned my attention to the oil pressure gauge.  The glass face of the gauge broke somehow but I'm not sure how.  Autometer sent me another face so I used some SuperGlue to put it on.  I did this with the others with no trouble so that I could mount them without the bezel.  This time, the SuperGlue vapors inside the gauge coated the inside of the gauge face with a white fog.

Suprisingly, Autometer sent me two gauge faces.  I decided I'd use the plexiglass one and after much trouble, I was able to get it to look decent.  I then painted and assembled the entire dash cluster.  Before I had it completely together, I heard a pop and flipped the cluster over to find another gauge face cracked.  Seems the gauge is being put under some pressure and I did not notice.  This puts me back to where I was at the beginning of the day.

I decided I'd put the cluster in the car and admire the appearance (while ingoring the new crack).  I plugged it in and turned on the key to see how the gauges lit up.  Instead of seeing them light up, I saw a little smoke come out from behind the dash.  I turned the key off and seems the black/green wire was shorting out.  I don't know why but I'm stopped today before I tear anything else up.

Saturday, November 19, 2011

Reinstalling Dash Components

I worked on reinstalling the dash components over the last few evenings and today.  I put the pedals, fresh air vent, wiper motor, pin switches, radio, glove box, ash tray, headlight switch, ignition switch, and all of the wiring.  I've even started on the dash trim and A/C vents but do not have all the hardware I need to finish the job.

I noticed today I never finished the wiring for the gauge cluster.  I'll need to work on this soon so it can be installed.  I'll then need to install the parking brake, wiper linkages, steering box, column, and steering wheel. 

I'd also like to make a rear deck out of MDF.  The openings for speakers in the metal are not large enough for the 6 x 9 speakers which were installed.  If I can space them up 1/2 an inch or so, they will fit much better.  I'm going to save this towards the end of the interior project.

Tuesday, November 15, 2011

Installation of Dynamat Extreme

Several years ago, I installed some Dynamat Extreme in my wife's car with excellent results.  In order to keep the interior a little quiter (and cooler) I decided to use some of the product in the Mustang.  My focus was primarily on the firewall.  With the all the underdash components removed, the job was straightforward.
 

The underdash and toe board area required about sixteen square foot of Dynamat.  I had four square foot remaining and a few rectangle scrap pieces of Dynamat.  I used the larger piece to cover the areas of floorboard above the mufflers.  The pieces cover from the edge of the framerail to the drive shaft tunnel which should be more than adequate.

I used the smaller rectangle scrap pieces in the rear floorboard area.  You don't actually have to cover the entire floorboard to hear the benefit.  While these sections are not much, I could tell a difference in the tone of tapping the floorboards.  The alternative was to throw them in the trash so why not.


 I'll wipe down the floor in the next day or two and put the carpet back in the Mustang.  It will be nice to have something a little soft to sit on as I reinstall all of the dash components.  Additionally, I'd just like to see the interior start to take shape again as the carpet was last in September 5th of last year!

Sunday, November 13, 2011

Dash & Behind Dash Painted!

On Wednesday night, I checked the area behind the dash and the Rust Converter had done its job.  The rust had all turned a dark black color indicating it was neutralized.  I went ahead and painted the area behind the dash with Eastood's Rust Encapslator. 

Today, I painted the entire area behind the dash today with two additional coats of Krylon Satin Black.  The finished product looks much better than I expected when I started.  Once the paint dried, I installed the new plastic cowl hats.  The next step is to install the Dynamat Xtreme on the firewall to cut down on heat and noise.


I painted the face of the dash with the same Kyrlon Satin Black.  I then top coated it with a mist coat of Black Metallic from NPD.  The dash looks nice and I find it hard to stop myself from working all night to reassemble the dash.

Thursday, November 10, 2011

Edelbrock Heads Arrive!

My Edelbrock E-Street heads (#5025) arrived in the mail today.  These heads have me really excited to get the engine back together. My first impression is that they are very nice for the price and the exhaust ports are huge!


I called the engine shop today and requested they zero deck the block.  I'm really glad it is not too late to have it done.  The guy building the engine (Eric) was married this weekend so the block has not been assembled.  Since I'm having this done, my compression ratio will be at exactly 9:1 without milling the heads at all.

Sunday, November 6, 2011

Timeline to Start-Up!

I'm really ready to get the Mustang back running again.  I've about finished all the painting which is the final restoraton step.  The best part is installing all of your new or newly restored parts and watching it all come together.  I expect to finish around Christmas as there are so many weekend commitments and holidays coming up.

I took some time today to clean up the garage and the car a little today.  I swept up some, cleaned up some parts, and then wiped down the outside of the car.  Everything was so dirty and it is nice to start off the reinstallation of the parts with the clean work area.

I took out the brace which holds the pedals when I stripped the area under the dash.  I cleaned it up today and coated it with Rust Encapsulator.  I also removed the master cylinder which has rusted some since I installed it two years ago.  I cleaned it up, sprayed it with Rust Encapsulator, and then used some VHT cast colored engine paint to get it looking nice again.

I've the following to-do list to finish this project up:

- Install Cowl Hats
- Install Dynamat
- Paint Dashboard

- Install Gas Line

- Install Pedal Brace
- Install Master Cylinder
- Install Dash Wiring
- Connect Electric Fan
- Install Pedal Assembly
- Install Clutch & Throttle Linkage
- Install Gauge Cluster
- Install Steering Column and Wheel
- Finish Interior Installation

- Repaint Throttle Linkage
- Touch Up Engine Bay Paint
- Install Engine Mounts
- Reinstall Engine
- Install Transmission
- Install Driveshaft
- Install Exhaust
- Install Parking Brake

There are many, many small steps between all of these which need to be addressed.  I'm glad I don't expect to just get incredibly dirty or greasy for the remainder of this project.  I've come in covered in dirt and pieces of gound metal so many times.  It starts to get old after a while.

My Ever Expanding Engine Project

After contemplating if I should reinstall the engine or replace the bearings.  I searched the Internet and posted questions on a few message boards and about decided to leave it alone.  I then decided to go ahead and remove the heads in preparation for the camshaft swap.  This would allow me to get them upgraded to screw in studs.

After a week or two, I decided to go ahead and take out the cam.  The first few lobes slid from the block with no problem.  The cam then stopped and would not come out any further.  It took me a second to realize the back side of the first cam bearing was damaged and would not allow the cam to slide out.

I inspected it for a while and strangely, the damage did not impact the cam.  It looks like someone was aggressive with installing the distributor and ended up tearing up the cam bearing.  In a  moment of poor judgement, I used the cam to hammer out the front bearing.... nice, right?  Anyway, it came out and did not damage the block or anything else.
 

Since I was without a cam bearing and worried about the condition of the rest of the motor, I decided I would take the block to have it checked by a Vila's Motor Works.  The charge was only $60 for the block and $30 for a set of heads to clean and determine exactly what work was needed to get them into great running condition.  I dropped them off on the morning of Monday, October 24th.

On Halloween, I received a call from the machine shop stating the block did not need to be bored and could just be honed and reused.  I was glad as I don't know if it could handle a boring to .060 over.  The deck did not need any work as it was perfectly flat.  The block needed new cam bearings, new crank and rod bearings, and freeze plugs.  The only machining needed was to cut the crank .020/.020 under.

I was told the 351 heads would need a large amount of work in order to use them.  The guy who worked on them, Mark, was a bit pessimistic about using them with an aftermarket cam.  He made a comment more than once when I spoke with him about needing new valves to run aftermarket springs.  This made me question his thought process.  In the end, I was told the total price to refinish them was $800.  I quickly told them I did not want to mess with putting that much money into those heads.

The cost for the block work was $270.  I decided I'd go ahead and get different pistons which would allow me to get a higher compression ratio.  I purchased a set of Keith Black flat top pistons (KB115), KB moly rings (4000AM8.040), Cloyes Timing Chain (9-1135), and Comp Cams XE256H (31-324-3) cam and lifter set which arrived on November 3rd.  I dropped them off the next morning with the 289 heads hoping they could be used at a cheaper rebuild price.


I did not question rebuilding the shortblock for a minute when I heard the cost.  However, the cost associated with the job started to hit home when I spent $500 on the parts shown above.  Unfortunately, the shop called stating the 289 heads were worse off than the 351 heads as the 289 heads did not have hardened exhaust seats.  This is when it really started to snowball out of control.

Last night, I searched for heads on the Internet and started considering options.  I thought of going with some GT-40 heads or just some stock style.  I could just use the 289 heads as they were working when I pulled them out.  However, I know there are at least four leaky valves based on a test I did at home.  It would be nice just to have a solid motor and not have to worry about it but all the heads I found were about $300 and they still needed screw in studs, milling, or were just questonable in general.

I started looking at the Edelbrock E-Street heads again.  I took a look at them at the GoodGuys meet I went to in March.  They are the exact same casting as the Performer and Performer RPM heads.  They just have different valves and springs.  I found they were on sale at 10% off until today and decided to buy them tonight.  I'll now need hardened push rods and roller rockers.... it never ends!

I'll need to have these heads milled a little in order to get to 9:1 compression ratio.  If I mill them down about .012, I will have a 58cc combustion chamber and 9:1 compression.  This is not outstanding but it is not bad either.  If I went further with the milling, each cc I decrease the heads by, I end up with another .1:1 which is not much of a gain.  It now occurs to me I probably should have gone with dome pistons but oh well.

As I spent some time cleaning the garage today, I thought about how different it will be to drive the Mustang again.  Since I drove it last, I'll install an electric fan, headers, full 2 1/2" exhaust, new pistons, cam, and aluminum heads.  I'm sure it will be quite different.  I'm ready but I'm thinking I'll need to ask for valve covers and a few other things for Christmas to be able to afford putting it back together.

Painting the Interior Floorboards

I started off today with spraying another coat of Rust Converter under the dash.  It will take 48 hours to dry and then I plan to put on two coats of Rust Encapsulator.  I'll follow that with some Krylon Satin Black to match the floor process below.

I spent time this evening sanding down the interior portion of the floorboards.  I used 220 grit on the entire floor and then wiped everything down with mineral spirits.  I used masking tape and taped off all the seams for the application of seam sealer.  I know this might sound crazy but it sure looks better than smearing it everywhere.  The Eastwood Seam Sealer I use is like tar and you don't want to get it anywhere you don't want it to stay permanently (including your hands).

The seam sealer can be painted in 30 minutes so I did just that.  I put about three or four coats up to the top of the toe boards.  I coated everything with Krylon primer but ran low at the end.  I used some Rustoleum primer which I had laying around which was a mistake.  The few spots I sprayed with it did not adhere as well.
The paint has more sheen than I would like as it shows too many imperfections but I'm not going to beat myself up over the appearance as I'm the only one who is going to see it.  I've ordered some Dynamat Extreme for the firewall and then the carpet will be installed in about two weeks and I'll likely never think about it again.


Saturday, October 29, 2011

Stripping the Dash Area

I worked on stripping the area behind the dash yesterday and today.  I used a few wire wheels and sheets of sand paper.  The job is really slow moving and hard to do thoroughly.  There are so small small areas where a drill does not fit and it is hard to do by hand with the sand paper. 

Once I had the underdash area as clean as possible, I wiped it down with mineral spirits and the put on a coat of Eastwoods Rust Converter on the underside.  This will help with the areas of rust in the corners I simplly can't reach.  I'll give that a few days to dry and then I'll top coat with Rust Encapsulator.  This might be overkill but there is a large amount of surface rust I do not want to remain active after I paint the panels.

I needed a break after all the sanding and finished the day by installing my new parking brake cables in the rear drums.  I'll need to wait to completely assemble the parking brake system until after the tranmission is installed.  However, this is one small project off the to-do list.


Once I finished behind the dash, I decided to go ahead and strip the front of the dash.  I stripped it using sand paper, paint stripper, and some wire wheels.  I sanded the entire front with 220 grit at the end to get it really smooth.  I then put on a coat of Eastoods Rust Encapsulator.  I'd like to go ahead and paint it but I'll need to wait until I have the area behind the dash finished up. 


For those of you wondering, I'd love to have taken off the dash pad.  However, it will not come off. Trust me, I've removed all the retaining nuts.  I searched the internet and found people were ripping them off because they end up stuck to the dash panels.

Unfortunately, the replacement dash pads do not look very good.  Since mine is original and in good condition (hard to tell with all the sanding dust on it).  My plan is just to leave it on and work around it.

Sunday, October 23, 2011

Undercarriage Painted!

I finished all the undercarriage preparation yesterday and spent the day today painting the underside of the Mustang. 

I used Dupli-Color TR250 Bed Coating on all of the undercarriage.  The coating is very durable but is not as thick as most bed coatings.  There is texture but it is very faint.  I put a total of three coats on the underside of the car which was five 16 oz cans.

I touched up some areas on the firewall and then painted the toe boards.  The firewall is painted with the Krylon 1613 Semi-Flat Black paint.  I then used some tape before undercoating the toe boards where they angle back from the firewall.  You can faintly see where the toe boards were welded into place but you would really have to be looking for it to notice.   

Saturday, October 22, 2011

Final Undercarriage Preparation

I spent today preparing the underside of the new floorboard for paint.  There were a large number of small things I needed to take care of which caused the task to take much longer than I expected. 

I started off at the rear of the floorboard by preping the rear floorboard seam and torque boxes.   I then sanded the underside of the entire floorbard with 220 grit sand paper.  The next step was to seam seal each of the points where two factory panels overlapped.  Once that was done, I sprayed the entire underside with a coat of Eastood's Rust Encapsulator.

The Rust Encapsulator is going to be dry and ready for a top coat in the morning.  I've six cans of some bed liner I've chosen to use on the underside of the Mustang.  The bed liner is much thinner than most and does not have as much texture.  I used it on the outer front fenderwells a few years back and it has held up well. 

I really wanted to use something other than spray cans.  However, I'd need to buy an air compressor and find a way to raise the Mustang high enough to get a paint gun under the car.  Additionally, I'd need to learn how to use a spray gun which might take a little while.  Since the spray can version I used before held up well, I decided to use it so this project does not drag longer.

While what I did this weekend can be summarized in one paragraph, it was a lot of work.  I should  be able to paint the underside of the undercarriage tomorrow.  This will then leave me with the followings items to finish up:

- Strip Underside of Dash
- Repair Cowl Hats
- Strip and Paint Front of Dash
- Install Sound Deadening
- Install Firewall Pad
- Install Dash Wiring
- Connect Electric Fan
- Install Pedal Assembly
- Install Clutch & Throttle Linkage
- Install Gauge Cluster
- Install Steering Column and Wheel
- Repaint Throttle Linkage

- Install Engine Mounts
- Reinstall Engine
- Install Transmission
- Install Driveshaft
- Install Exhaust
- Install Parking Brake
- Install Gas Line
- Install Interior

Sunday, October 16, 2011

Toe Board Underside Clean-Up

I removed the engine to replace a bad motor mount and to reach the underside of the toe boards I welded into place earlier this year.  This weekend, I climbed into the engine compartment and worked on the underside of the toe boards.

There were a few spots where I did not have great weld penetration.  I welded the bottom side of these welds to make sure everything was solid.  I then ground down the welds and put a little filler to fix the small imperfections.  Most would consider this overkill but I know I'll be disappointed later if I don't do the best job I can while I have it apart.

Once the filler was dry, I sanded it down and top coated it with two coats of Eastwood's Rust Encapsulator.  I'll wait to prep the rest of the undercarriage for paint before doing anything further with the toe boards.

I took care of a few small projects while waiting for the paint to dry.  I stripped the driver side torque box in preparation for paint.  I welded on the passenger side brake bracket which I forgot to weld before putting the floorpan in the Mustang.  I also cut out the hole for the parking brake cable in the driver side toe board.

While it may not sound like much, this was the majority of what I was able to accomplish this weekend.

...

This is a picture of the toe boards after I put down a coat of filler.  I put down a heavier coat than needed.  I don't know how many times I have to do this and sand like mad before I realize how little is actually needed.

This is a picture immediately after I painted the bottom with Rust Encapsulator.  The paint dries somewhat fast.  The sheen is actually flat but you can see the parts which are still a little wet as they are have more sheen. 

Sunday, October 9, 2011

Checking Engine Condition and Specs

I've wanted to replace the camshaft in the Mustang for a while now.  Since the engine is out of the Mustang, now is as good of time as any to change it out.  I've a set of '69 351 heads as well I'd like to install.  Before starting this project, I decided I would go through the engine and check the condition.

Crank & Rod Bearings

I started by removing the oil pan to check the condition of the cranshaft and rod bearings.  I can tell they are a little worn so I've considered replacing them.  I asked about it on SBFTech and VMF but both suggested I just leave it alone based on the oil pressure readings I recorded about a year ago.


Camshaft
I checked the specs on the cam before removing the heads and cam.  The intake had .230 lift at the cam (.368 at the valve) and .237 exhaust life (.380 at the valve).  After removing the heads and cam, I found the number 560 stamped on the end of the cam. 

A few internet searches revealed it is a Sealed Power 560 cam which is a stock replacement cam.  The specifications on Summit match up to the stock cam grind referenced in Tom Monroe's book on SBF engines.


Intake Duration at 050 inch Lift: 184
Exhaust Duration at 050 inch Lift: 189
Duration at 050 inch Lift: 184 int./189 exh.
Advertised Intake Duration: 292
Advertised Exhaust Duration: 265
Advertised Duration: 292 int./265 exh.

Lifters

The lifters seem to be in excellent shape.  There are no strange marks on the face which rode on the cam lobes.  They slid easily in and out of the lifter bores.  I took them out and put them in an old container in the proper order in case I ever need to inspect the lifter which came out of a particular bore.

Pistons
I noticed the bottom of each piston has the number 1157 cast into the skirt.  I searched the Internet and found these are Keith Black Silv-O-Lite pistons.  They are dish pistons but I could find no cc measurement of the dish size on the Internet.  I emailed the company and they responded stating the dish is 12 cc. 

I measured the bore with a dial caliper and it is bored 040 over.  Once I cleaned off the tops of the pistons, I could make out a 40 stamped into the top of each of the pistons.  I checked how far in the hole the pistons are at TDC. I used a gauge to get the piston to TDC. I then slid a feeler gauge under a piece of metal laid across the top of the piston. The measurement is rather large at .035.

I later learned this is because these pistons have a compression height of 1.585.  Many pistons for a 289 have a compression height of 1.605.  This would change the amount the piston is in the bore from .035 to .015.  This paired with the dished piston gives me a current compression ratio of 8.17:1 which is shamefully low.  Switching to any aftermarket head with a 60 cc chamber (or even the '69 351 heads) is going to drop compression even lower (to 7.74:1 with current parts).


The head gasket they used was a Fel-Pro 8548PT-2.  It has a compressed thickness of .047.

Timing Chain

This isn't the best picture but the engine has single roller timing chain installed.  The chain has seen better days as it seems to be a little stretched.  I chose this picture as you can see the extent of the stretching on the far side of the chain. 


Heads

I took several measurements of the 351 heads to make sure I order the correct valve springs.  I removed all the valve springs with a tool I rented from O'Reilly.  I noticed the valves seem a little loose in the guides.  I also tested with water to find three valves which leak slightly. 

I decided to check the 289 heads I took off and found they have four leaky valves.  I took off a couple of springs and the valve guides seem a little tighter.  A strange oddity is that the 289 heads do not have the bump in the exhaust port but the 351 heads do. 
I've learned a fair amount about the condition of the motor.  I'm not sure what I'm going to do with it at this point.  There is the desire to have it rebuilt but there is also the concern that since it is already bored 040 over that that might not be an option.  I think I'll take it to a local machine shop and let them evaluate what I'm working with an give me some suggestions.

Sunday, September 25, 2011

Strange Suspension Sound Fixed!

Since the front suspension rebuild, I would hear a loud thud noise when I hit a bump on the driver side.  It was somthing I mainly heard when driving down a rough road near my house at about 30-35 MPH.

I went through the driver side suspension numerous times trying to locate the cause.  I checked all the bolts, checked clearance, and made sure I was not hitting the bumpstop.  The solution or cause of the problem always seemed to elude me until today (yesterday actually).

Look at the engine mounts connected to the engine block in the following two pictures:


You will notice part of the mount is missing on the driver side.  It was impossible to tell the mount was damaged until I removed the engine.  The mount is comprised of a metal bracket on top and one on the bottom.  The two pieces are connected by molded rubber.  The rubber separated from the top piece of metal but with the engine weight on the mount, everything looked fine.

It seems the noise I would hear when hitting a bump was actually the engine bouncing on the mount.  Who would have thought that would be the solution to what seemed to be a suspension problem.

Saturday, September 24, 2011

Engine Removal

This morning, I started the various tasks needed to remove the engine.  The task was easier as I've already removed the transmission, throttle assembly, exhaust, and z-bar setup.  

I started by draining all the coolant from the radiator.  I then removed the radiator, alternator, export brace, starter, valve covers, and hood.  I purchased a plate which attached is place of the carburetor for lifting out the motor.  I went ahead and removed the carburetor and installed the lift plate


I rented a 1500 lb engine crane from RedTail Equipment.  I then purchased a 1000 lb engine stand from Harbor Freight.  I covered the sides of the engine bay, front radiator support, and drapped a towel down the back side of the motor so it would not scrap the firewall.  I then attached the crane, removed the engine mount bolts, and started pulling the motor.

The motor came out with relative easy.  It is a little alarming at first to pull the motor and realize the entire weight is on the crane.  Its one of those moments you can see the engine just crashing down into the car and damaging everything.  Fortunately, that did not happen.  I pulled the engine without a single scratch to the engine compartment.

Once the engine was mounted on the engine stand, I started cleaning up the garage.  Coolant drained out onto the floor and created quite a mess.  I'd rolled the Mustang almost out of the garage to get enought space for the crane.  Once I cleaned the floor up, I rolled the Mustang back forward so the garage door could close again.

It is rather difficult to have an engine on a stand in your garage and not start thinking about putting in a new cam or other performance parts.  I just need to focus on finishing up what I need to do on the floorpan.  I'll save doing anything on the engine until the very end. 


More on this later.... I found the following in the engine compartment and I'm trying to decide if it is a valve stem seal or something else.

Monday, September 12, 2011

Unexpected Call from Stanger

In early January, I packaged up my steering box and shipped it to Randy Meyer (Stanger) for rebuild. 

Randy was already behind but stated he could start on the rebuild in February.  I originally expected to finish the dash restoration in March.  This timeline matched with the expectation I had on when the steering box would be restored and returned.  However, as you have noticed the project expanded beyond restoring the dash.

I've sent a few emails to Randy for an update on his progress but never received a response... until today.  Randy called and caught me a little by surprise.  Randy said he expected to finish up the rebuild this week.  He would then give me the amount (probably the $140 basic charge) sometime later this week and we could arrange payment.

Randy believes my steering box does not have many miles on the box or someone took the time to keep it regularly lubricated. Normally there is pitting on the internal gears and wear on the center gear. He said my gears are not really worn at all and there is no pitting. The only issue was a little waviness to the metal were the upper and lower bearings set on the input shaft. He had this machined, replaced the internal wear components, and added a new seal as the old one was leaking.

I'm looking forward to getting the steering box back.  Sounds like it will be just in time.

http://www.stangerssite.com/

10/19/11 Update: While it took a little longer than expected, my steering box arrived today.  The box looks great.  The only down side is the pitman arm is not attached.  I'll need to do that in the coming weeks.

Sunday, September 11, 2011

Driver Fenderwell Finish Work

Today, I worked on the firewall/toe board area which is visible from the driver wheel well. 

There was not much clean up needed in this location because of the toe board welding.  Instead, the work needed was correct a welding job a friend helped me with in 2009.  There was rust from the windshield washer pump.  At the time, I did not know how to weld so he stepped in to help out.  As you can see below, he mounded up weld at the joint and asked me not to grind it off or it would damage the weld.


Since I'm now much better at welding, I decided to fix the eye sore.  I ground down all the welds flat and then welded up any pinholes I found.  The panel was not lined up perfectly when it was butt welded in.  I put a little filler over it to hide that and then coated it with primer. 

I stripped the side panel which is adjacent to this one and in front of the driver door (under the fender).  I then put seam sealer on the gaps on that panel and in this toe board area.  I'm waiting on more of the RT250 Duplicolor bed liner to arrive so I can coat both areas.  When that is done, I'll post and 'after' picture of how it turned out.

Saturday, September 10, 2011

Remaining Tasks on Current Project

At about this piont in each project, I take inventory of the tasks remaining.  The end of the project starts to become visible but just does not arrive fast enough.  Marking tasks off the list is motivating for me as it confirms the project is getting closer and closer to an end.

Anyway, here is the list of things I have left to complete:
- Tighten Leaf Spring Bolts
- Paint Transmission Support Brace
- Prep Rear Floor Seam & Torque Boxes (Strip, Prime, & Seam Seal)
- Prep Driver Torque Box (Strip, Prime, & Seam Seal)
- Finish Work & Paint Toe Board Area in Driver Fenderwell
- Prep Front Frame Rails (Strip, Prime, & Seam Seal)
- Weld Passenger Parking Brake Bracket
- Cut Hole in Floor for Parking Brake Cable
- Repaint Throttle Linkage
- Remove Engine
- Smooth Underside Toe Board Weld
- Undercoat Floorpan
- Install Engine Mounts
- Reinstall Engine
- Seam Seal Upper Side of Floorpan
- Strip Underside of Dash
- Repair Cowl Hats
- Strip and Paint Front of Dash
- Install Sound Deadening
- Install Firewall Pad
- Install Dash Wiring
- Connect Electric Fan
- Install Pedal Assembly
- Install Clutch & Throttle Linkage
- Install Gauge Cluster
- Install Steering Column and Wheel
- Install Transmission
- Install Driveshaft
- Install Exhaust
- Install Parking Brake
- Install Gas Line
- Install Interior

I've a busy September and October ahead of me with work and Boy Scout commitments for my son.  However, I hope to be at the point of reinstalling items by the beginning of November.

Friday, September 9, 2011

Finish Work on the Undercarriage

I decided against working on the dash today.  Instead, I worked the underside of the floorpan.

I welded up the a section on the rear of each of the sub-frame connectors.  I'd saved the final weld until I had the floorpan installed and could jack up the car a little.  Once they were done, I seam sealed over the welds and up the sides of the floorboard along the rocker panels. 

I had very good penetration on all my welds.  A few of the welds for the seat risers and toe boards caused divits on the underside of the car.  I grinded those off and then put a little primer over the bare metal spots. 

I cleaned up the passenger side torque box I added to the car.  I then painted the area where I made the toe board repair which is visible from the driver wheel area.  I then covered the repaired area and the torque box with some Duplicolor TRK250 bed liner.  Its the same stuff I used on the outer fender aprons a few years back and its still in excellent condition.


I cleaned up the welds on the front frame rails, transmission support, and transmission tunnel.  Once I had those smothed out, I coated them with primer as well. 

I've not seam sealed the frame rails, transmission crossmember, or transmission tunnel.  I'll be unable to work on the car tomorrow but might be able to find time to do these on Sunday. 

The day was somewhat productive. It was not as gratifying as welding in the floor. There is just something to be said for finishing an entire part of project. Today was more about wrapping up some lose ends and getting ready to paint the underside of the car.


Thursday, September 8, 2011

Finally Finished Welding the Floorpan

A welcome change in the weather occurred this past Sunday.  The temperatures in Texas dropped from a daily high of around 105 degrees to 90 degrees.   Without the hot garage to fight against, I decided it was time to get moving on the Mustang.  This involved taking today and tomorrow off work to dedicate to the project.

On Sunday, I welded in the passenger side seat riser.  Before welding the riser in place, I sanded the inside and floorboard which would be covered by the seat riser.  I coated them both with Eastwood's Rust Encapsulator and then Satin Chassis Black.  This might not be necessary but I wanted to keep the inside protected as the originals were not and were filled with rust when I removed them from the Mustang.

I started off the morning today by installing the driver side seat riser.  I had already painted it like the passenger side on Sunday.  I used the same installation approach as with the floorpan by fitting the panel and then drilling holes to plug weld the seat riser into place.  Each of the seat risers had about 40 holes in them about 2-3 inches apart.

With the seat risers in place, I turned my attention to the rear section of the floorpan under the rear seat.  The new floorpan did not extend all the way to the rocker panels.  The driver side was close enough to work the metal to get it to fit.  However, the passenger side was at least a 1/4" and there was no way to get it to fit without a fair amount of modification.

To make the passenger side fit, I cut off the end of the floorpan which welds to the rocker panel.  I placed the cut directly over the frame rail.  This would allow me to weld it to the rocker panel and then fill the cut area with weld.  The job was not too difficult as the frail rail flange made welding the gap closed much easier.


With everything welded, I started the process of grinding down all of my welds.  There are a few which a placed two far into a corner to grind down.  This bothers me a little but there is nothing to do about it.  Additionally, only I'll know as I'm going to coat the floor with sound deadener and you will never see it.


I worked from 8AM to 5PM on the Mustang so it was definitely a long day.  Tomorrow, I think I'll work on stripping the area behind the dash.

Saturday, August 13, 2011

Reshaping and Welding the Front Floor Tunnel Area

The Dynacorn full floorboard does not align perfectly at the front of the transmission tunnel.  This was fairly obvious when I completed welding the floorboard to the rocker panels.  I continued welding the new floor to the toe boards on each side saving this project for later.  As you can see below, there is about a 3/4" gap between the reproduction transmission tunnel and lower firewall panel.


I used a small torch to heat the sides transmission tunnel on the floorboard.  I then used a hammer and dolly to reshape it to match the vehicle.  As the panels lined up properly, I welded about half way up the tunnel.

In order to continue to contour the sides of the panel, I had to make two cuts in the floorboard.  I made the cuts at about an inch down on each side.  This allowed me to continue working on the alignment on the sides of the tunnel.  Once those were complete, I then worked on the top and welded from the center out.

Once all of my plug welds were done, the cut areas needed work.  Since I had too much metal on the floorboard tunnel, I had a slight overlap where I cut the panels.  I used a cutoff wheel to take off the overlap leaving me a good gap to reweld the panel. 

I finished up my welding and then used my grinder on those welds and the welds I'd not finished up from the driver floorboard.  The front part of the floor is now complete.  There are some alignment problems at the back and I'll handle those in the furture.

I've not painted the front of the floorboard.  I plan to do this tomorrow or in the next few days.